


Ready to Get Started
At Provance, we go out of our way to bring you great service. That’s in our digital DNA. Your IT success is our success.
Today, Service Desk agents need a solution that emulates their own natural way of working and they need the right tools to support that natural behavior to best service their end-users, whether that’s customers or employees. When we engineered ServiceTeam ITSM, we used user-centered methods to inform our design decisions to incorporate the user’s (agents, managers and end-users) natural behaviors so we can improve the end-to-end service experience.
The COVID-19 pandemic significantly impacted IT support services and accelerated the need for a Service Desk transformation. With the increase in workload it has been challenging for many agents to keep up and fulfill their customer’s expectations. In this blog post, I’m going to show you how ServiceTeam ITSM enhances the agent experience to help them facilitate a more seamless service experience.
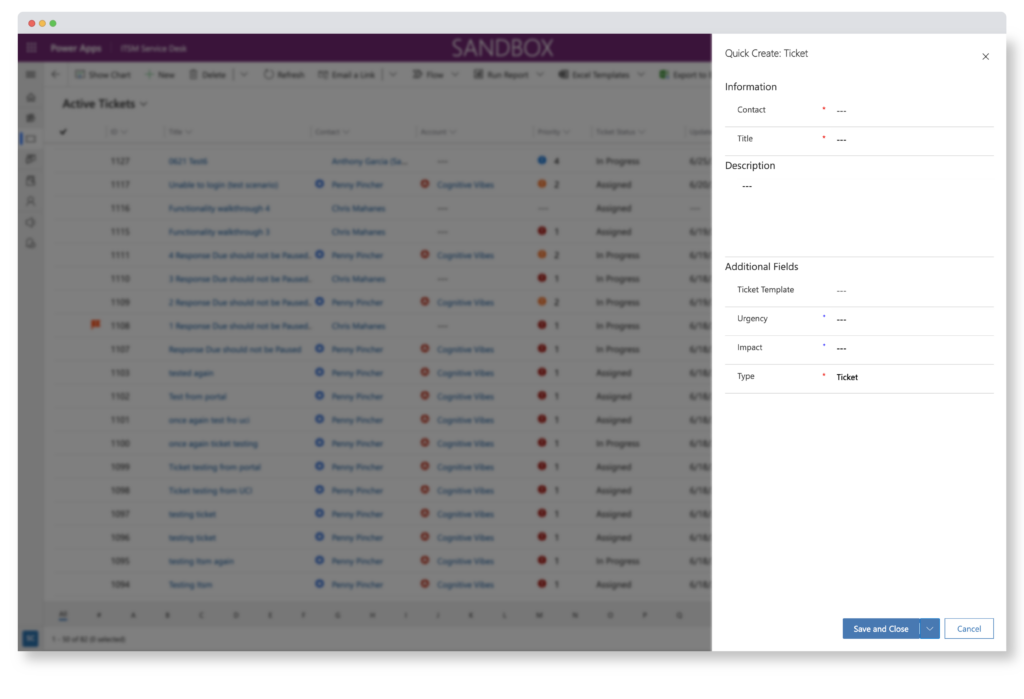
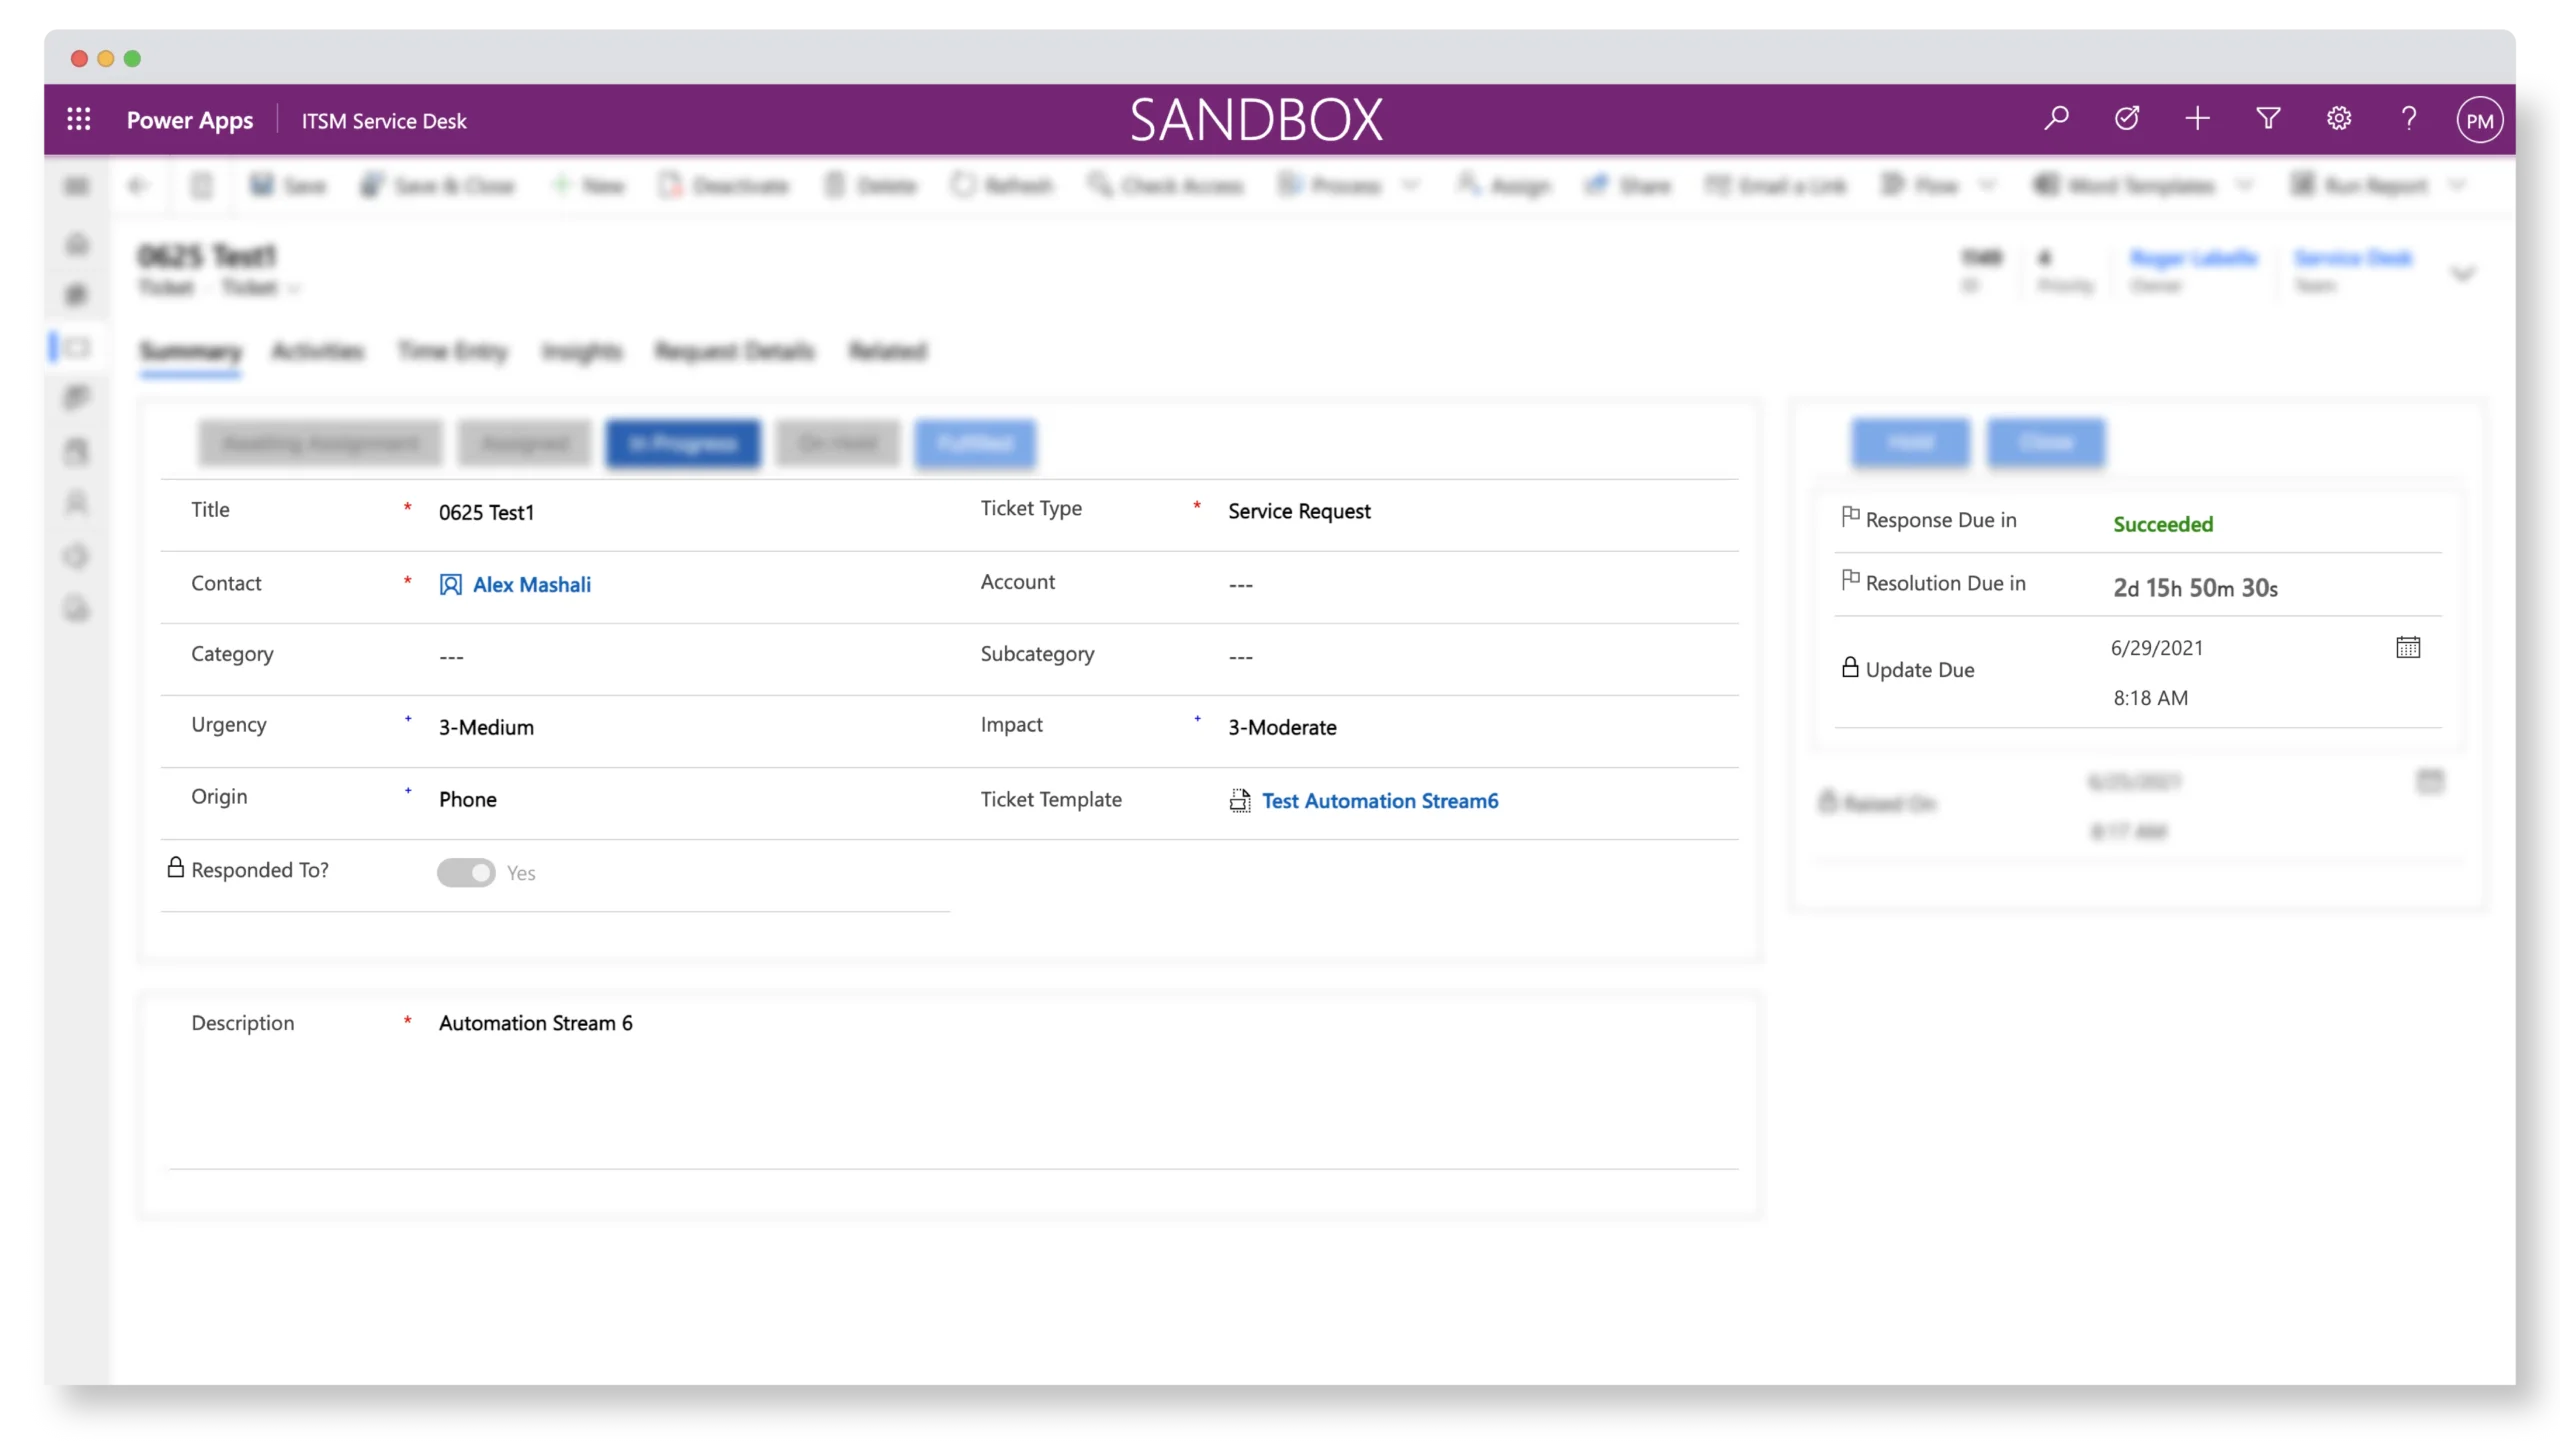
In ServiceTeam ITSM, tickets can be created via the self-service portal and email, or agents can create tickets for the end-users using the quick create ticket option available within the ServiceTeam ITSM app. Once a ticket has been created, triaged, and assigned, agents can quickly start servicing the ticket. A ticket template allows agents to populate standardized information regarding similar issues making sure agents have captured all relevant information against a ticket.
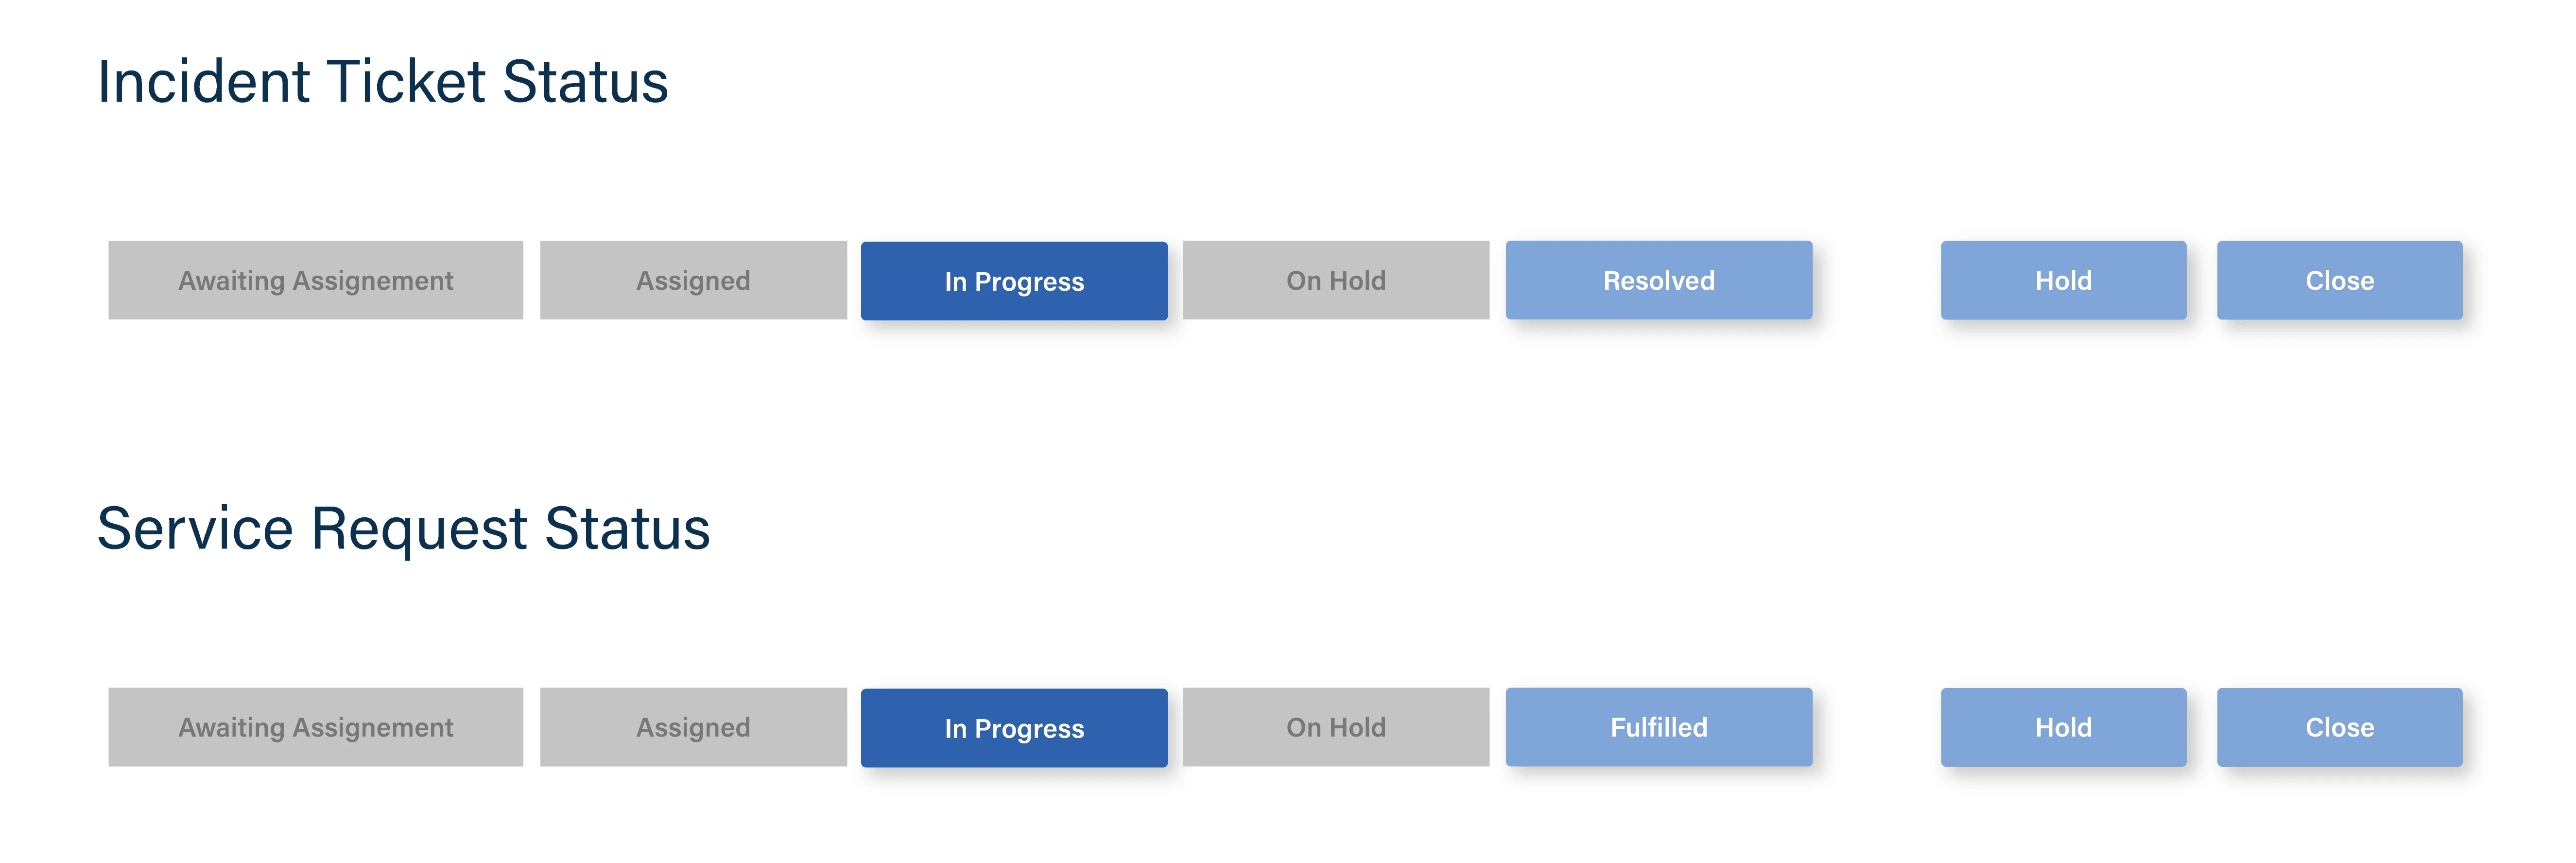
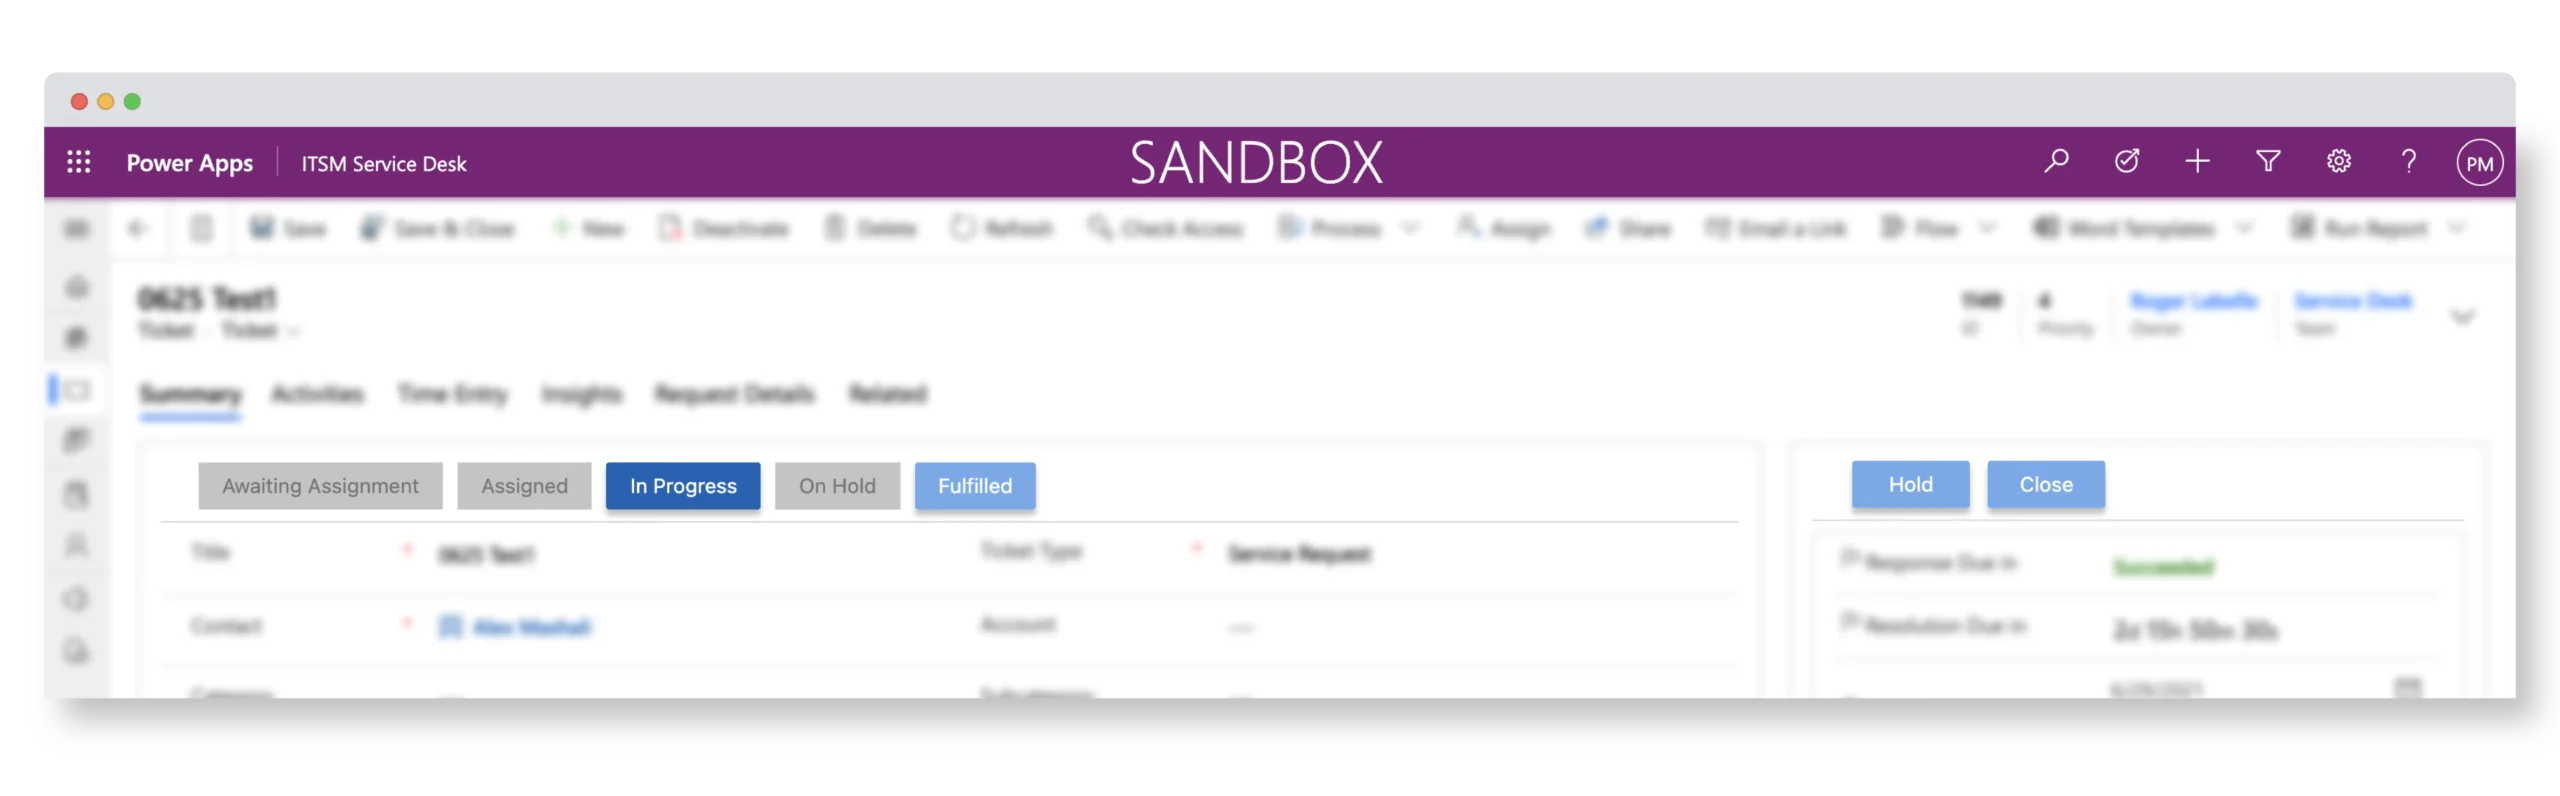
Ticket status controls are associated with each ticket type. For example, in the case of an incident, “Resolved” indicates a solution was provided while “Fulfilled” indicates that a Service Request was completed. These status controls provide agents a non-linear process to go through the servicing stages and fill out the required information when they obtain it without delaying the process from moving forward when needed. This lets the agent focus more on taking care of the end-users and servicing the ticket rather than focusing on updating too much information on a record. However, keeping the needs of different companies in mind, ServiceTeam ITSM allows the organization to configure their status controls.

During the ticket’s lifecycle, agents can also efficiently switch the ticket type (change from service request to incident, for example) in just two clicks without losing any previously added information, making the entire process more efficient, flexible and easier-to-use. ServiceTeam ITSM provides the foundation to efficient and successful ticket management.
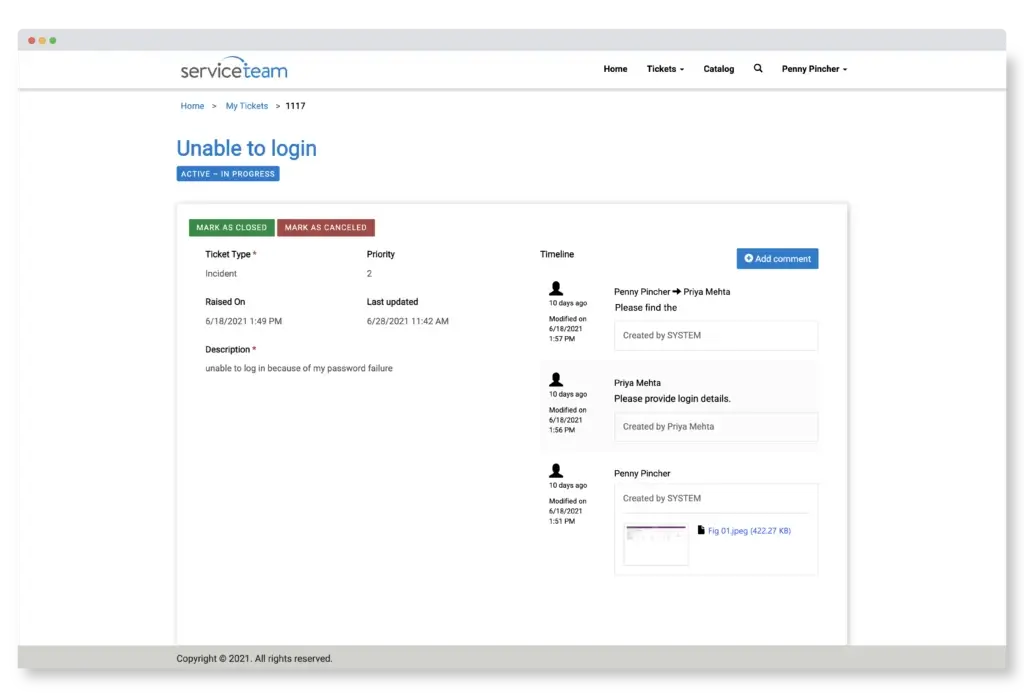
ServiceTeam ITSM lets agents, managers and end-users easily view the status of tickets. This helps to bridge the communication gap between agents and end-users. With ServiceTeam ITSM, agents can effectively communicate ticket status to the end-users and eliminate the wait for the end-users to get updates throughout the ticket’s lifecycle. End-users can either check the ticket’s status on the ServiceTeam ITSM self-service portal or receive email updates.
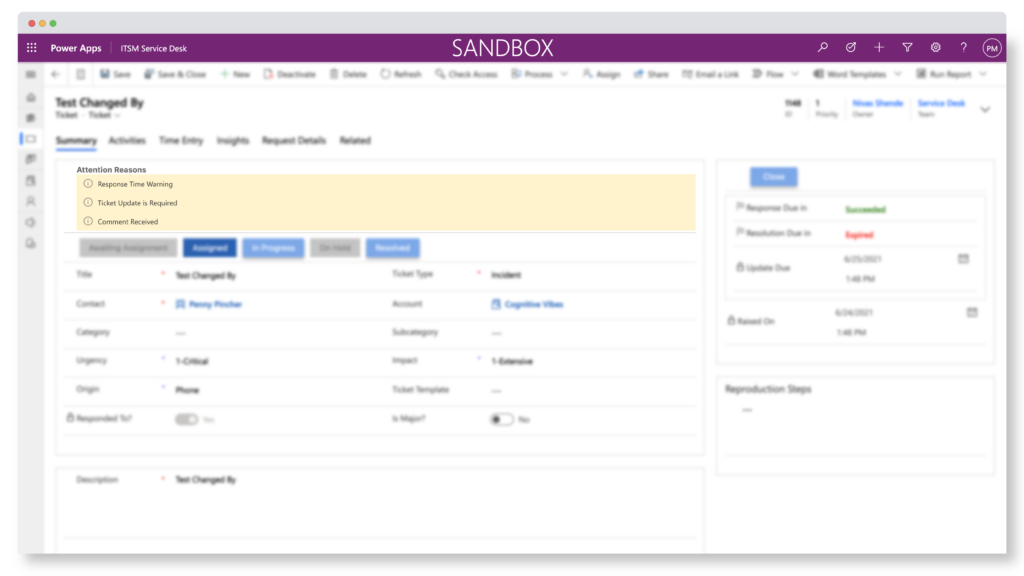
Sometimes agents may feel overwhelmed by the amount of information exposed to them at every phase of the ticket’s servicing journey. Looking at the agent experience holistically, we engineered the ticket process workflow to reveal relevant information only when needed.
Reduced form fields and collecting only meaningful data saves time for the agents, allowing them to focus on servicing the end-users. This also helps in streamlining data for analytics.
Prioritization of key information becomes essential when workload increases. The current ServiceTeam ITSM Dashboard views are designed to address this issue. We have introduced visual cues to highlight information such as VIP, hot account, and update due on the dashboard views.
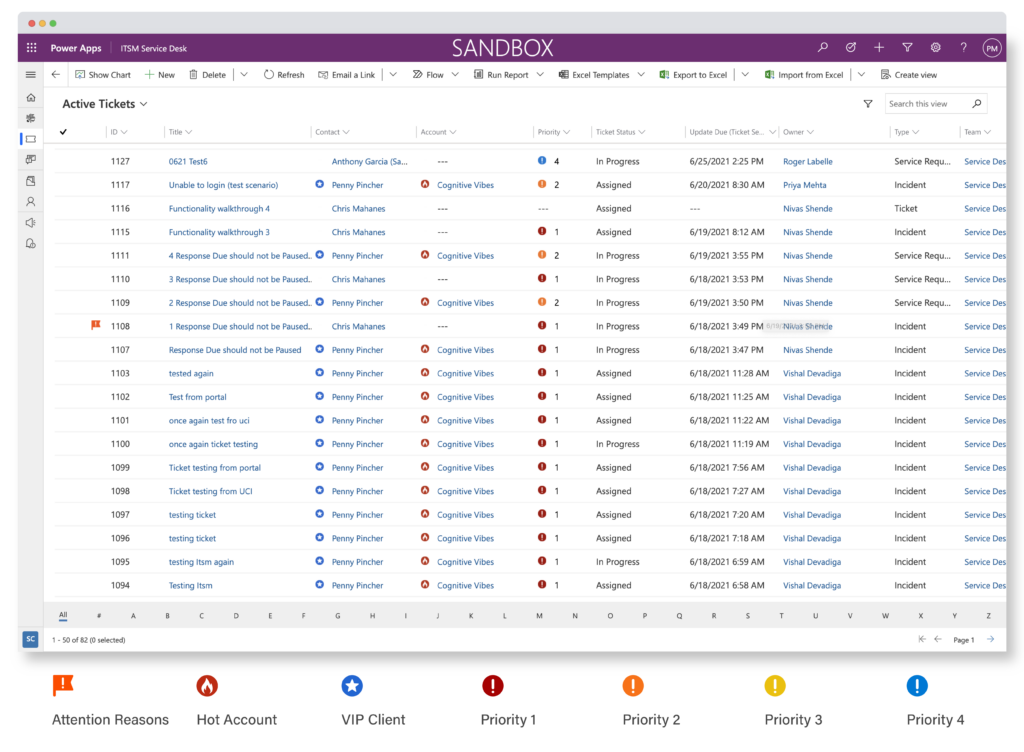
We also implemented the Attention Reasons feature. This feature raises a flag on a ticket for various reasons, such as incoming portal comments and email, resolution time breach, resolution time warning, response time breach and ticket update required.
The different proactive visual cues help agents to prioritize their work and stay ahead in their game. Additionally, agents are just one click away from accessing the ticket and two clicks away from seeing the updated information.
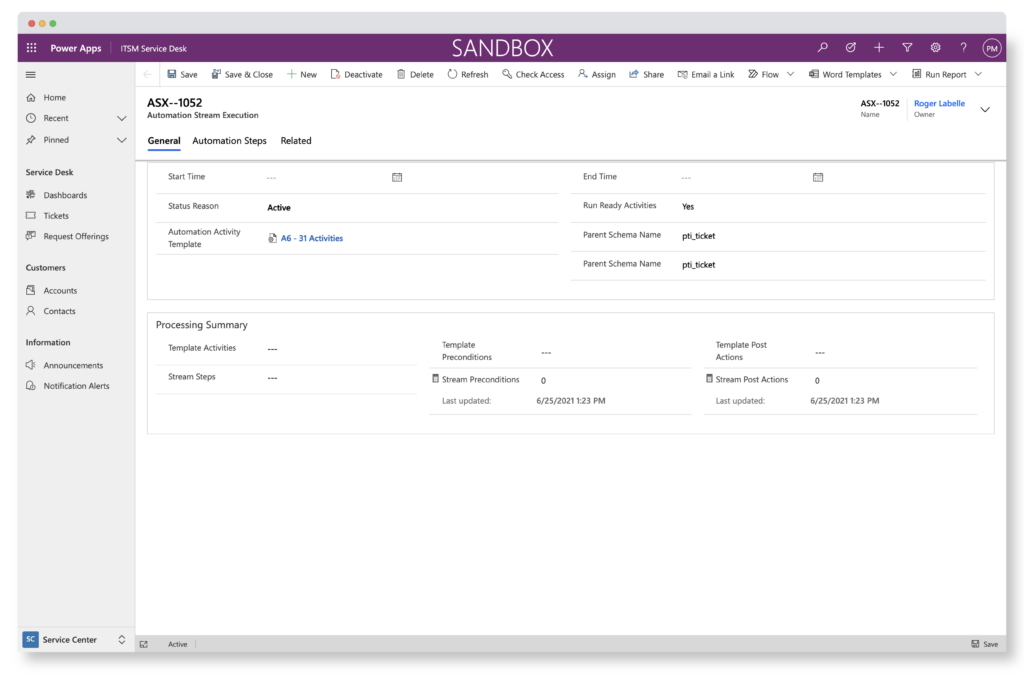
The efficiency and efficacy of agents can be positively impacted by utilizing automation. Automation helps eliminate tedious work expected by the agents to service their end-users so agents can focus their energy on the more immediate investigative work. ServiceTeam ITSM lets you automate touchless service requests and anticipate issues. Agents only need to intervene when ServiceTeam ITSM identifies an issue.
In conclusion, as ServiceTeam ITSM and technology evolves, we will continue to humanize ITSM step-by-step and design with user-centered methods in mind. We will engineer ServiceTeam ITSM to help agents deliver more frictionless customer experiences, reduce their overall servicing time, and streamline their communications both internally and externally.
Learn more about ServiceTeam ITSM Power Apps. City of London Transforms IT Services with ServiceTeam ITSM and the Microsoft Power Platform. Read about the benefits and capabilities of ServiceTeam ITSM.
Read our blog posts:
Why Our Customers Choose ServiceTeam Over All The Others
A New Era of Service Desk Operations
Why and How Your ITSM Capabilities Need to Change
Microsoft Copilot: The AI and Automation Opportunity for ITSM

At Provance, we go out of our way to bring you great service. That’s in our digital DNA. Your IT success is our success.